Friday, September 17, 2010

MDF extruder made

So I made the MDF extruder parts last night.  Kind of hackish, but I think it'll work.  I marked out the notes on the mdf based on a mishmash ideas from several designs online for the paxtruder, the printstruder, the metal printstruder, the basic Mk4 and the new Mk5.  Still have to finish the front/back plate  to hold in the idler bearing assembly and the tension on the idler.  Here's a pic of what it'll look like assembled.

MDF stepper extruder

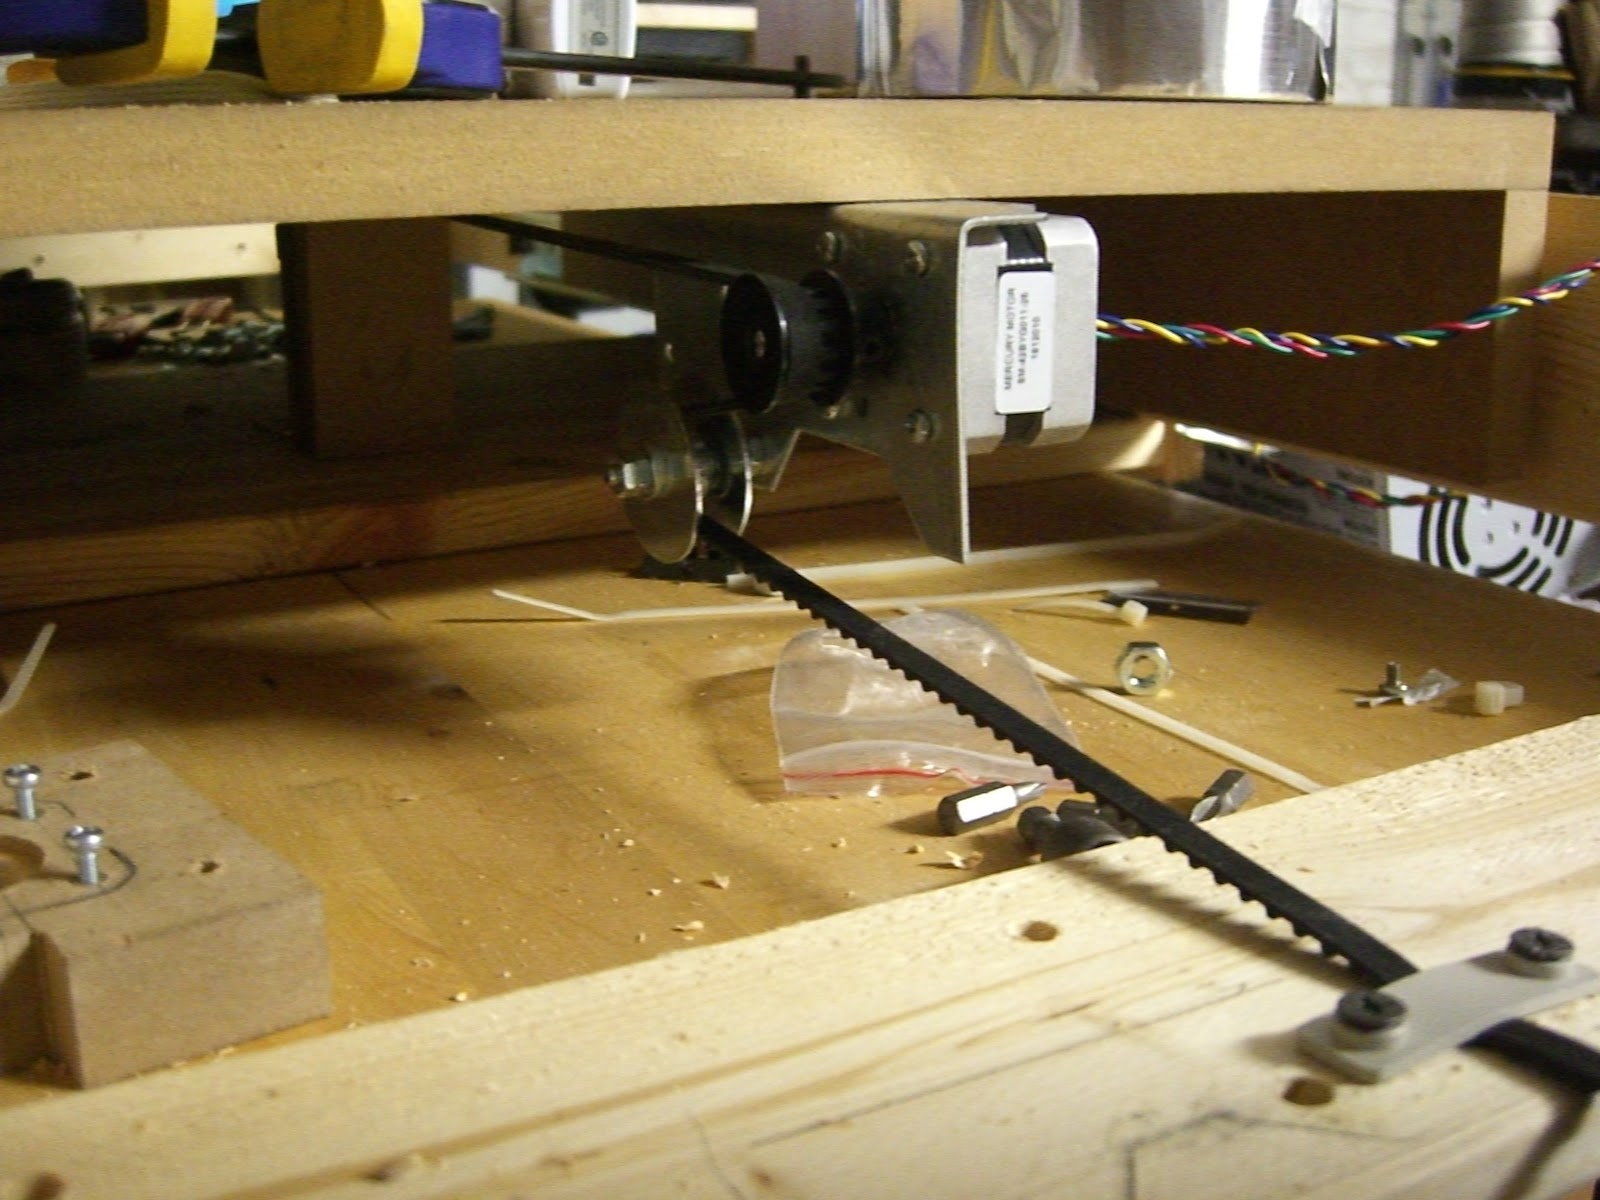
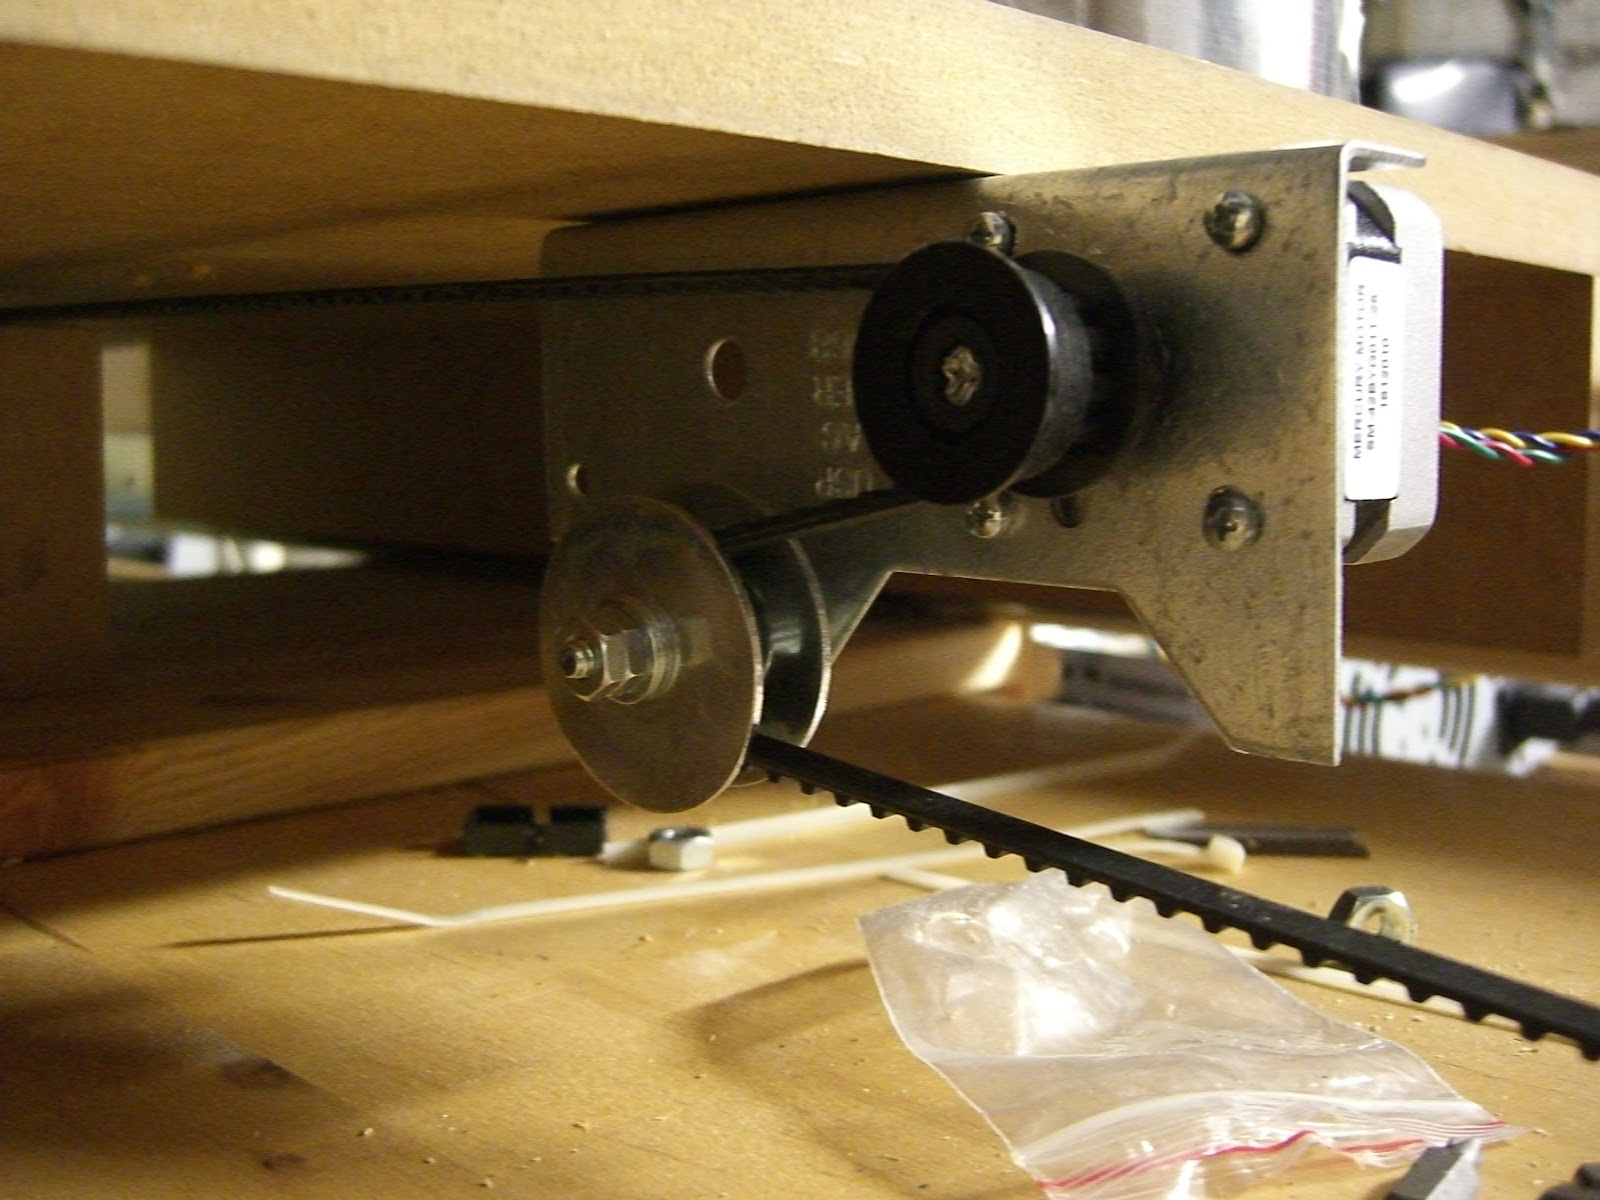
and here's a view of the parts

MDF extruder parts

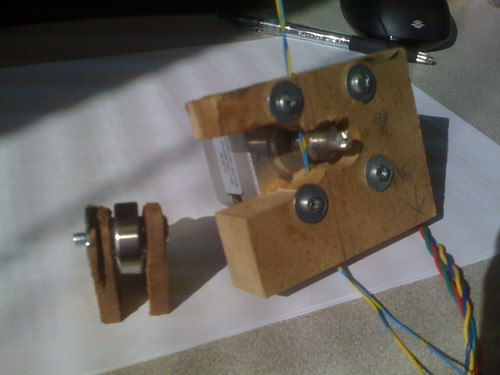
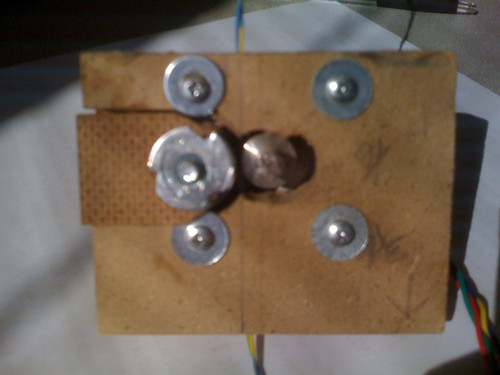
It has the NEMA17 stepper attached to the MDF block.  The stepper has an MBI Mk5 drive gear on the shaft.  The shaft of the stepper was 5mm I think and the bearing was designed for a 6mm shaft that is on the kysan gearmotor MBI uses so I had to pad out the stepper motor shaft size with some metal tape to get it to be a snug fit for the drive gear.  I had to do similar things with the timing belt gear pulleys.  The bearing is a standard 608 skate bearing.  I'm using a T-nut and a 10-24 screw to hold it between some masonite pieces that slide in the hole of the MDF block.  I have to get a few bits from the hardware store to finish things up.  I need a spring or some other method of applying pressure to the bearing assembly to drive it into the drive gear.  I'm thinking a spring of some sort would do nicely, or a screw mechanism like the paxtruder design. The blue/yellow wire in the picture is where the ABS filament will pass through the extruder.  I misplaced the small piece of ABS I was testing with last night, it's probably on the floor of my shop somewhere.  So once I get the idler attached, I'll be able to connect the hot end and try it out.  Hopefully I can do that tonight.  If this works and I can get the machine working, my next task will be to calibrate the machine and then print out upgrades for this extruder.  I'm planning on printing up a Wade's and a brutstruder as possible replacements.

If this works, I think I now have everything for the 3d printer.  I just have to finish assembling the pieces and get things calibrated.  So very close!

Thursday, September 16, 2010

Mechanical endstops constructed

Finished wiring up my mechanical endstops.  This should complete all the electronic bits for my repstrap.  I've got the main firmware on an Arduino Mega, 5 steppers connected to 5 of my pololu carrier boards, two thermistor circuits, and two mosfet circuits.  The endstops (min and max) are wired to connect in via the stepper drivers I made up.  There are rj45 connectors on those that accept the connections.  I've got a big box of cat5 plenum cable, so I wired up my own cables.  For the actual mechanical endstop end, I just deadbugged the components to the side of the SPDT switch.  I used the following schematic for wiring up the stops. http://code.google.com/p/makerbot/downloads/detail?name=makerbot-mechanical-endstop-1.1-r1.zip

don't have any picture of the setup, but I'll scan in a pic of the cables later.  I have to do a whole write up of the process and my design when I'm done.

I've also decided to try to take several paths forward on my extruder.  I will be making an extruder to hold my stepper out of mdf that I will mount the hot end to.  I will also be headed to my local hackerspace to see if I can get a Wade's extruder printed there on the Darwin they have.  I will also be trying to see if I can get a metal frame extruder built in case the MDF one won't work.  If I can get the MDF or metal one to work, I'll promptly be printing a wade's and also a brutstruder.  Or if neither the MDF or metal extruder are able to be made, I'll be working to get the Darwin printing and print out a wade's at the hackerspace.  The hackerspace route may take the longest, since I am only able to make it out there once a week on Monday nights after the kids head to bed.  but with these options, I hope to have a functional printer soon.  If I can't get any of these things to work, I'll buy a stepper brutstruder from Makergear, but I think I can get things working.  I've been trying to build this machine up from bare basics as much as possible to learn everything I can about the reprap/repstrap process.  I hope my MDF route works, since it is the easiest and fastest route forward that I can see.

Monday, September 13, 2010

Z axis back to leadscrew

So I had plans to belt drive my z axis but it just wouldn't work. The axis is too heavy and my counterweight plan didn't work because of the weight of the axis and because the pulleys had too much friction. So I'm back to a leadscrew for the z. It is a 1/4-20 all thread studding. I had problems figuring out how to mount it before but last night I got most of it layed out. Before I was trying to put the motor at the top on the front and have the captured nut right next to the platform. Now I cut out a panel in the support and the motor sits on the bottom with the threaded rod pointing up. The captured nut is back behind the z slides and attached to the z sled with some angle iron (actually some rack mount ears from some old router or switch.) This should solve the problem I had before with the support of the far end of the driven rod. When I had leadscrews on the x and y they would bind up because I was supporting the side of the rod away from the motor in makeshift pillowblocks. The three parts weren't in alignment and so would bind up. I figured out that you didn't really need to support the far end anyhow. So with this verticle setup with the motor ar the bottom is easer than the motor at the top since I don't have to worry about support it alignment of a far end point.

Still have to figure out a coupling that works. I've been using tubing but I need proper pipe/tube clamps. I'll pick some up at the hardware store tomorrow. I had made do with zipties connecting things but it would slip if the rod binded. I may do a coupling connector from the hardware store ifit I can drill and tap some grubscrews into them. Well see how it goes tonight

Saturday, September 11, 2010

Belts in for x and y axis

So I just finished putting the belts in for the x and y.  the x is a simple continous loop with a clamp tied to the belt that connects to the x sled.  The Y is in an S-configuration.  Here's a pic


and here's a close up of the stepper and the way the belt goes through.

The metal frame that the stepper and idler pulley is attached to is a piece of metal angle used for joist or rafter support, I think.  It was $0.89 each at the hardware store.  I had to bore out the holes for the center shaft, and add in mounting holes for the stepper, but it was an easy way to mount the stepper 90 degrees.

The x and y moved when sent commands via repsnapper.  I still have to adjust my firmware to dial in the correct number of steps per mm and such, but I'll do all of the axis at one time.  I need to finish my counterweight on my z head, then it will be driven with a belt too.  I'm working on a stepper driven extruder to get me though testing and printing out a wades extruder to replace it.  I think I'm going to make a printstrucer with mdf, kind of like the aluminum one that is in thingiverse.  I bought a mk4 printstruder from MBI, but I've got my own RAMPS shield going and don't have a dc motor controller on it, just a bunch of pololu stepper controllers.  So I'm trying to make it work.  using the hot end, and may try to fit a stepper in the mk4, but we'll see.

Here's a pic of my electronics

It's a big hairy mess of jumper wires on the mega shield.  I moved the pololu boards off onto my pololu carrier boards and put headers on the shield.  It cost more, but I think it'll be a cleaner look.  I've got the pololu connectors still on the shield, so I could go back to that, but I was afraid that my jumper wires wouldn't be able to carry the current. (I'm using telco cross connect wires, I work in IT and I've got a box full of random length spools that I've picked up over the years in telco closets and it rooms.  As things went voip, not much need to do ratsnest crossconnects on 66 blocks for voice lines in the office, so I got to keep the remnants of the cross connect wire from various jobs as I did the voip transition)